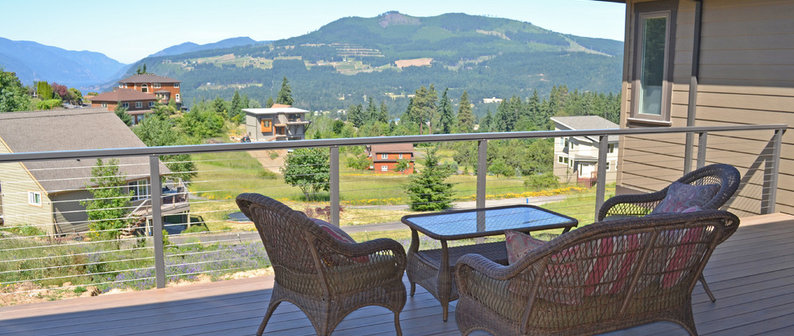
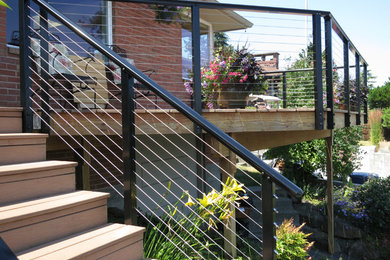
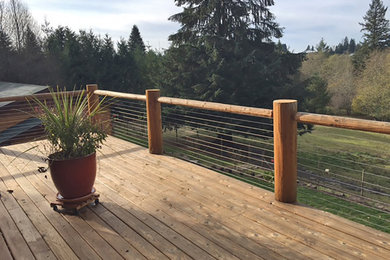
I have a three story house, on a steep slope, in the mountains west of Denver. My main floor living is my second floor and my deck (walkout from the 2nd floor) is my outside area for entertainment. After 20 years, the 600 sq. ft. deck needed a makeover. I decided on B grade redwood to replace painted wood. The hand rail was a baluster style and in my demolition and initial reconstruction I planned on staying with that style …until…. I discovered some cable rail kits at a lumber yard. I thought a cable rail would really enhance my deck and since I was doing the work myself I could work it into my budget. I started exploring the installation parameters and costs and after some initial calls to Stainless Cable and Railing (SCR) to understand the structural requirements for post placement, I proceeded to relocate some of the new posts I had already installed for the baluster hand rail so as to comply with the post placement for cable rails.
After the initial conversations with SCR, I knew the maximum allowable distance between the 4x4 posts and that I wanted to run the cables through the posts. I did not know where to start the cable runs, where to stop them, how to turn corners or where the tension should be. I took advantage of the design service from SCR by sending in a drawing of my deck depicting the layout with precise measurements between the posts. I also included photos of every conceivable start/stop point and every turn. They reviewed the drawing and photos, designed the railing system, sent me a quote and I placed the order. Rather than have SCR swage the cables, I decided to field swag them because that method looked straight forward enough, was the least cost option, eliminated the risk of measurement errors, and reduced the amount of scrap material.
The SCR design divided my deck into 4 sections (cable runs) and incorporated the least cost option given that I needed surface mounted components for some posts and through-the-post components for others. I follow the design precisely and learned some things in the process. Lessons learned:
1.A long straight run, even one with a slight turn, can be tensioned in one direction.
2.If you make a 90 degree turn in wooden posts, even with hole protectors, you’re better off tensioning in both directions away from the turn.
3.For consistence in drilling the holes in the posts, make a template out of 2x2 roof flashing and line up the cables between the start/stop points with a string.
As the railing construction progressed, one section required that I modify the SCR design. The modification was necessary so that I could tension both directions from a 90 degree corner. This change dictated a new list of materials and returns of some unused components. SCR accepted my returns without issue. They were great to work with and their prices were competitive. I did an analysis of my final costs compared to some prepackaged kits and determined that I had saved money and did not compromise quality.
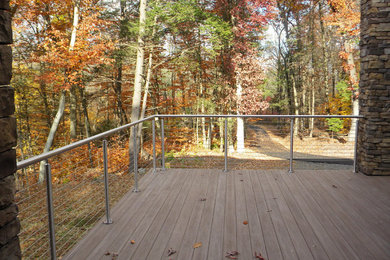
I am proud of the way my deck turned out I’ve included some pictures for review. I’m also very satisfied with the product and assistance I received from Stainless Cable and Railing. I would recommend them and when spring rolls around I’ll be going back to them from more product to redo a small deck on my third floor and a walkway to my front door.


コメント (2)